
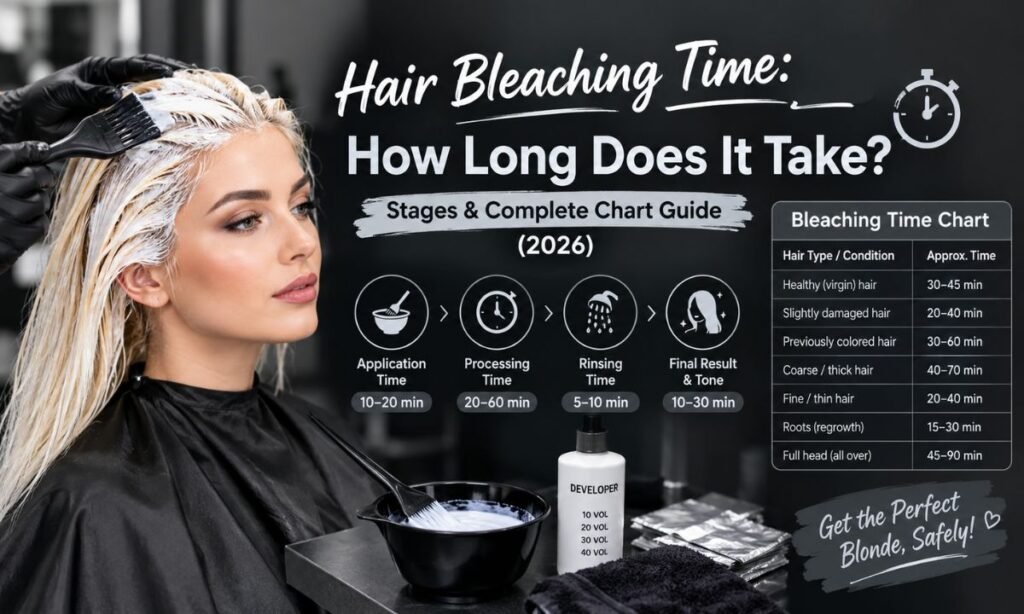
If you’ve ever sat in a salon chair, or your own bathroom, watching the clock while bleach sits on your hair, you already know the big question. How long is too long, and how short is too short?
The honest answer is that bleaching time isn’t a single number. It depends on your starting shade, hair texture, porosity, and the developer strength you’re using. Every head of hair reacts differently to the same product, which is why two people can use identical bleach and end up with very different results.
But there is a reliable range, a set of stages your hair passes through, and a chart you can actually use to plan your session. Knowing these numbers ahead of time helps you avoid rushing the process or leaving bleach on far longer than it needs to be. That’s exactly what this guide breaks down, from the chemistry involved to the exact timing you should expect at home or in a salon chair.
What Is Bleaching and How Does It Work?
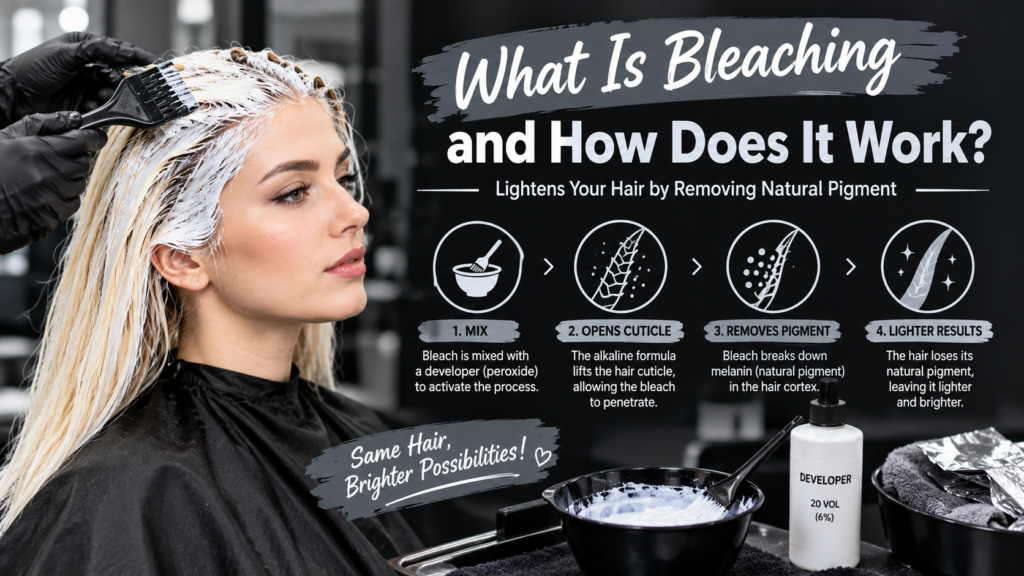
Hair bleaching is a chemical process that strips natural or artificial pigment from the hair shaft, lightening it before toning or coloring. It is the foundation step for almost every dramatic color change, from platinum blonde to vivid fashion shades. Unlike hair dye, which adds color, bleach removes it, working from the inside of the strand outward.
The Chemical Process
Bleach powder or cream is mixed with a developer, which is hydrogen peroxide in varying strengths. Once applied, the alkaline agents open the hair cuticle, allowing the mixture to penetrate deeper into the cortex. The peroxide then oxidizes melanin, the pigment that gives hair its natural color, breaking it down molecule by molecule.
As melanin breaks down, hair lightens through a predictable sequence of undertones, moving from black to red to orange to yellow to pale yellow. This sequence is the same for almost everyone, though the speed at which hair moves through it varies widely. Understanding this progression is the single most useful tool for judging when to stop processing.
Difference Between Bleaching and Lightening with Dye
Lightening dyes, like high-lift color, can lift hair a few shades while depositing some tone at the same time. They are gentler, but their lightening power is limited compared to true bleach. This makes them a good option for subtle changes rather than dramatic transformations.
Bleach, on the other hand, doesn’t deposit any color. It only removes pigment, which means it can lift hair much further than any dye alone. This makes bleach the go-to choice for platinum blondes, pastel colors, or any look that needs a clean, light base to build on afterward.
What Are the Bleaching Stages and How Do You Read Them?
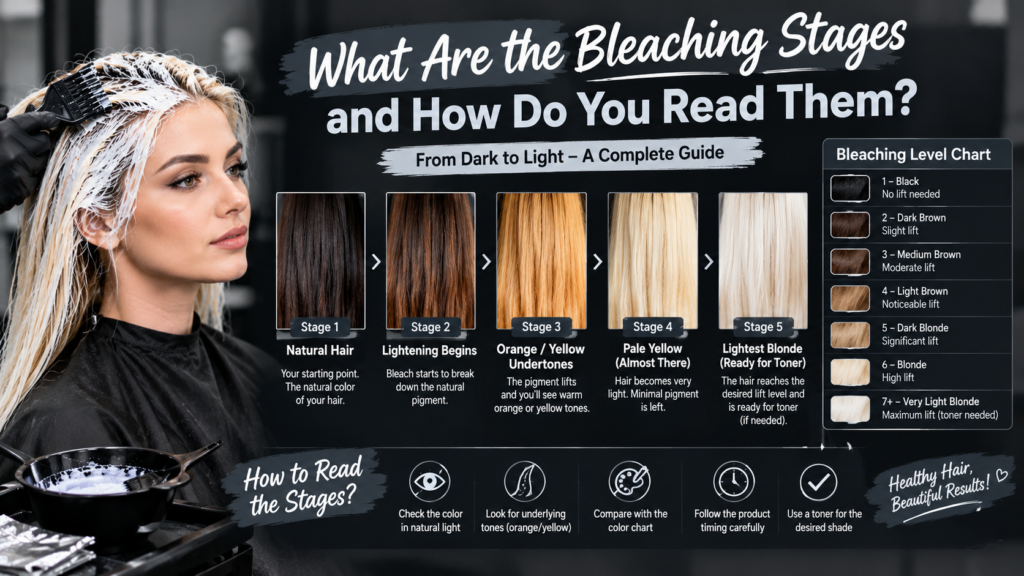
Hair lightens in stages, not instantly, and each stage represents a “level” on the standard one to ten hair color scale. Level one is black, and level ten is the lightest pale blonde. Watching hair move through these levels in real time is the best way to control the outcome.
As bleach processes, hair typically moves through these visual stages, each one signaling a shift closer to the target shade:
- Black or Dark Brown, with little to no visible lift
- Red, as melanin starts breaking down
- Red-Orange
- Orange
- Orange-Gold
- Gold
- Yellow
- Pale Yellow
- Pale Yellow-White
- Lightest Pale Blonde or White
Stage Chart by Level
| Level | Color Stage | Typical Starting Point |
| 1–2 | Black | Very dark, unprocessed hair |
| 3–4 | Red / Red-Orange | Dark brown hair |
| 5–6 | Orange / Orange-Gold | Medium brown hair |
| 7–8 | Gold / Yellow | Light brown hair |
| 9 | Pale Yellow | Dark blonde hair |
| 10 | Pale Yellow-White | Light blonde hair |
Why Knowing the Stages Matters
Reading the stages lets a stylist, or you, know exactly when to stop processing before hair goes past the desired tone into damage territory. Every extra minute past the target stage adds stress to the hair shaft without adding any real benefit to the final color.
Stopping at the wrong stage is one of the biggest causes of brassy, uneven, or over-processed results. Learning to recognize each stage on sight, rather than relying only on a timer, gives you far more control over the final outcome.
How Long Does Hair Bleaching Actually Take?
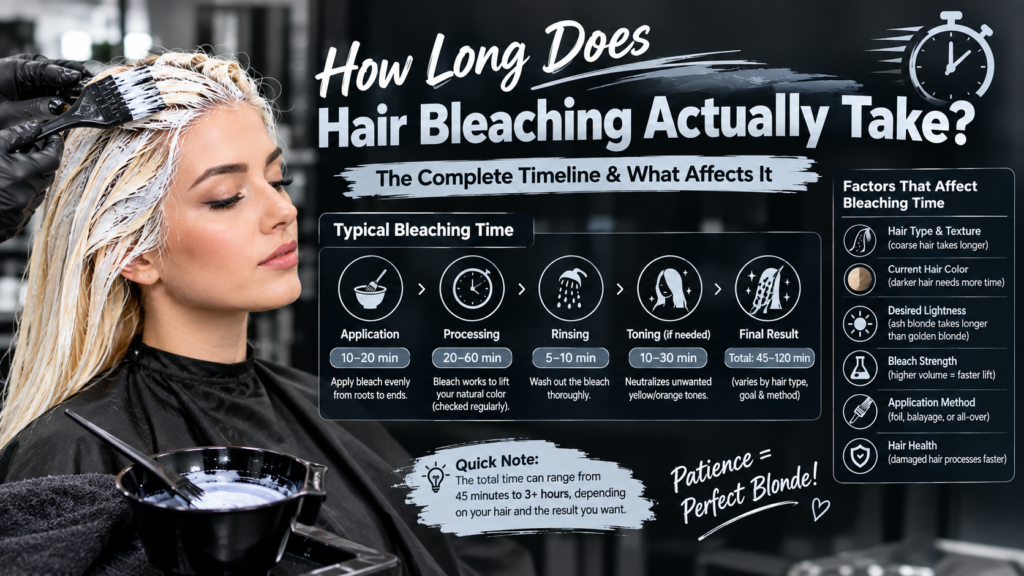
On average, a single bleaching application takes thirty to sixty minutes to process. Total appointment time, including sectioning, mixing, application, and rinsing, can run one to four hours, depending on hair length and the technique used.
| Hair Condition | Average Processing Time |
| Virgin, fine hair | 20–30 minutes |
| Virgin, coarse/dark hair | 30–45 minutes |
| Previously colored hair | 15–25 minutes |
| Damaged or fine porous hair | 10–20 minutes (with close monitoring) |
| Root touch-up | 20–30 minutes |
These numbers are starting guidelines, not guarantees, because every strand of hair carries its own history. A strand test always gives you the most accurate reading for your specific hair, and skipping it is one of the riskiest shortcuts in the entire process.
See More: Hair Color Processing Time Calculator Calculate Your Perfect Timing
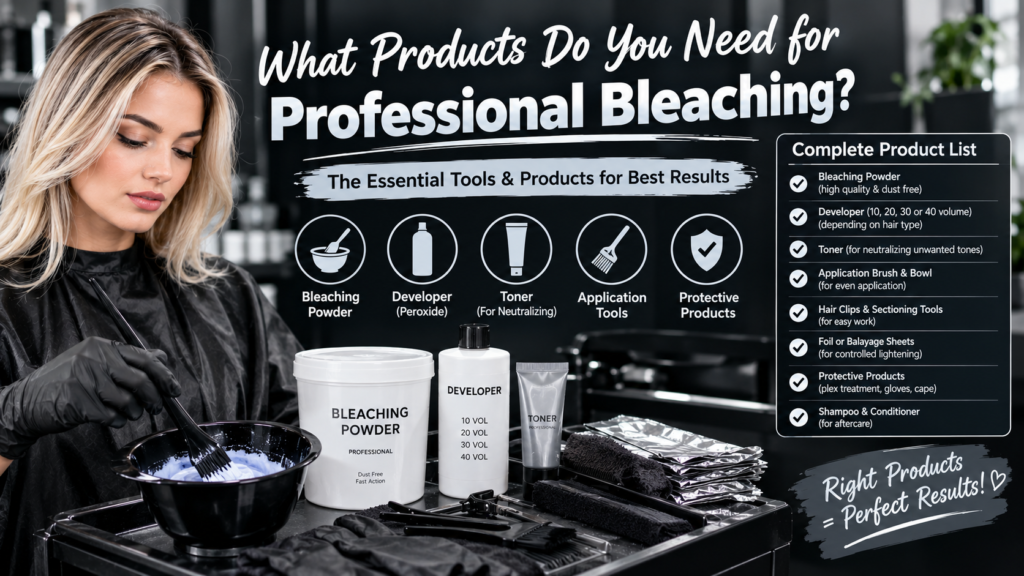
What Products Do You Need for Professional Bleaching?
Types of Bleach
Powder Bleach (Most Common) Fast-acting and strong, powder bleach is the standard choice for salons because it lifts quickly and evenly. It is especially useful for lightening dark hair several levels in a single session, though it requires careful monitoring to avoid overprocessing.
Cream Bleach Cream formulas are easier to control, less messy, and gentler on the scalp. Their thicker consistency makes them popular for at-home use or for people with sensitive skin who want a more forgiving application experience.
Oil Bleach Oil-infused bleach lifts more gently and is often used for subtle lightening. Many stylists choose it for hair that needs extra conditioning support during the process, since the oil content helps offset some of the dryness bleach can cause.
Developers for Bleaching
Developer strength, measured in volume, determines both lift and speed. Choosing the right one is just as important as choosing the right bleach formula.
| Developer | Lift Level | Best For |
| 10 Vol | Minimal | Toning, deposit-only |
| 20 Vol | 1–2 levels | Fine or damaged hair |
| 30 Vol | 2–3 levels | Standard bleaching |
| 40 Vol | 3–4 levels | Dark, resistant hair (used cautiously) |
Additives and Protectors
Many stylists add bond-building additives, such as Olaplex No.1 or similar protein-bonding treatments, directly into the bleach mixture. These additives work to reduce breakage and strengthen hair structure while the bleach is actively processed.
Using a bond protector doesn’t change the color outcome, but it significantly improves how the hair feels and behaves afterward. For anyone bleaching multiple levels at once, this step is considered close to essential.
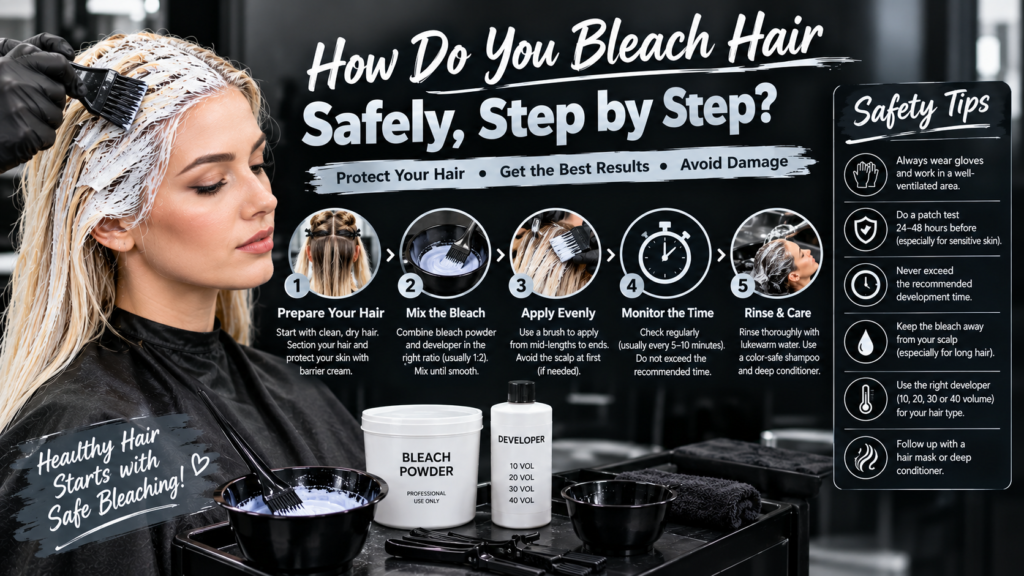
How Do You Bleach Hair Safely, Step by Step?
Before Starting: The Diagnosis
Check hair history, including previous color, chemical treatments, and current condition, before choosing a developer strength. This step prevents overprocessing and unexpected reactions that can happen when new bleach interacts with old chemical treatments.
A quick strand test at this stage can save hours of damage control later. It only takes a few minutes but gives a clear preview of how the hair will actually respond.
Product Preparation
Mix bleach and developer to a smooth, lump-free consistency, usually in a 1:1 or 1:2 ratio depending on the brand’s instructions. A poorly mixed batch can lead to uneven application and patchy results, so this step deserves careful attention rather than being rushed.
Application Step by Step
- Section Correctly: Divide hair into four to six clean sections for even, controlled application.
- Apply Mid-Lengths to Ends First: Roots are naturally warmer and process faster, so starting mid-shaft prevents uneven, hot roots.
- Saturation Technique: Fully saturate each section so bleach can work uniformly; missed spots cause patchiness.
- Time and Temperature Control: Process at room temperature and check progress every 10–15 minutes rather than relying on the clock alone.
Removal and Post-Care
Rinse thoroughly with lukewarm water once the target level is reached, since hot water can further open the cuticle and increase damage. Follow with a bond-repairing or deep-conditioning treatment to help restore some of the moisture lost during processing.
Avoid heat styling immediately after the service. Freshly bleached hair is at its most fragile, and giving it time to recover before applying heat tools can make a noticeable difference in long-term hair health.
How Does the Technique Vary by Bleaching Service Type?
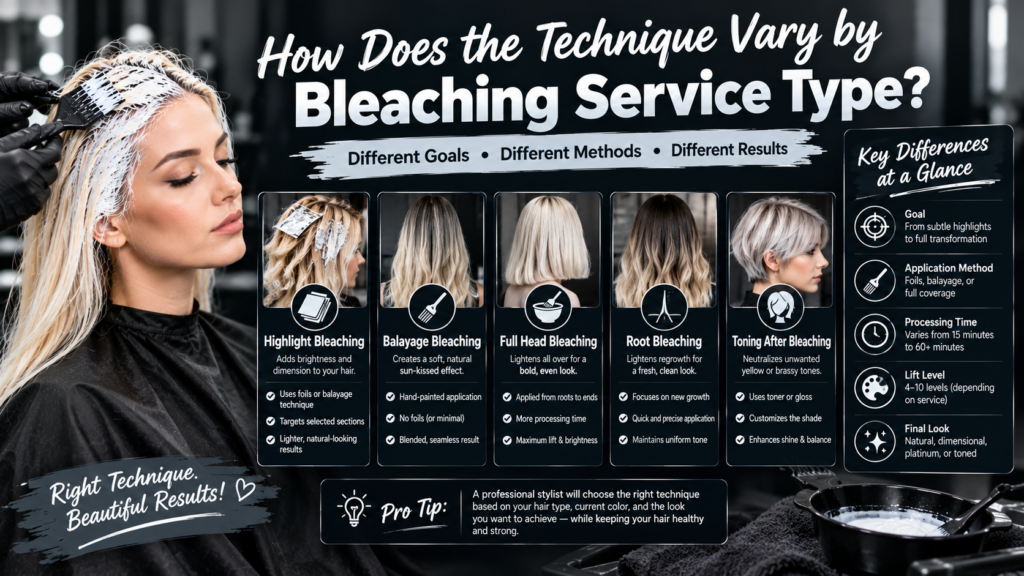
| Technique | Typical Time | Notes |
| Global Bleaching | 45–60 minutes | Full head, most intense heat exposure |
| Foil Highlights | 30–45 minutes | Foils trap heat, speeding processing |
| Balayage / Open Air | 45–90 minutes | Slower lift, more natural gradient |
| Staged Bleaching (Multiple Sessions) | Several sessions, days/weeks apart | Used for very dark hair going platinum |
Each technique carries its own risk profile alongside its own timing. Foils, for example, speed up processing because they trap heat close to the scalp, which means they require closer monitoring than open-air techniques like balayage.
What Are the Most Common Bleaching Mistakes?
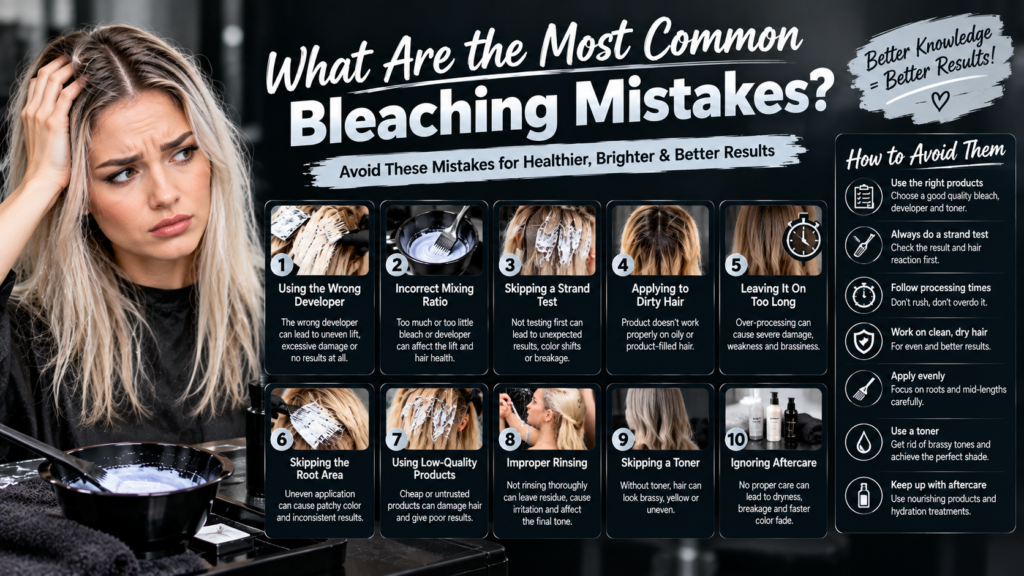
- Starting at the Roots: causes uneven, “hot root” lift since root heat speeds processing.
- Insufficient Product: under-saturating leads to patchy, streaky results that often require a corrective session.
- Not Monitoring the Process: skipping regular checks risks over-processing and unnecessary damage.
- Same Developer for Everything: using one strength regardless of hair condition ignores individual needs and increases breakage risk.
- Ignoring History: previously colored or chemically treated hair reacts unpredictably if history isn’t factored in.
Avoiding these mistakes is often more important than any single product choice. Most bleaching disasters come from skipped steps rather than faulty products.
What Toning Does Hair Need After Bleaching?
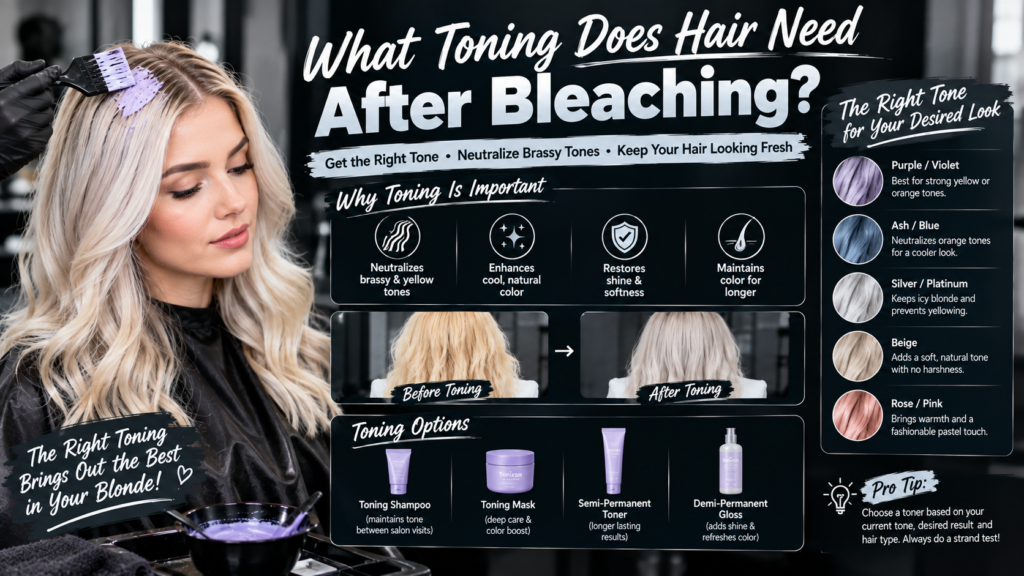
When to Tone
Toning should happen once hair reaches its final lightened stage, usually pale yellow or lighter, to neutralize brassiness and achieve the desired finished shade. Toning too early, before hair has lifted enough, often leads to muddy or uneven color.
Toning Products
Purple or blue-based toning shampoos, glosses, or demi-permanent color are commonly used to cancel out yellow or orange undertones left after bleaching. The right product depends on how warm the underlying tone is and how cool the final shade needs to look.
How Do You Maintain Bleached Hair After the Service?
In Salon
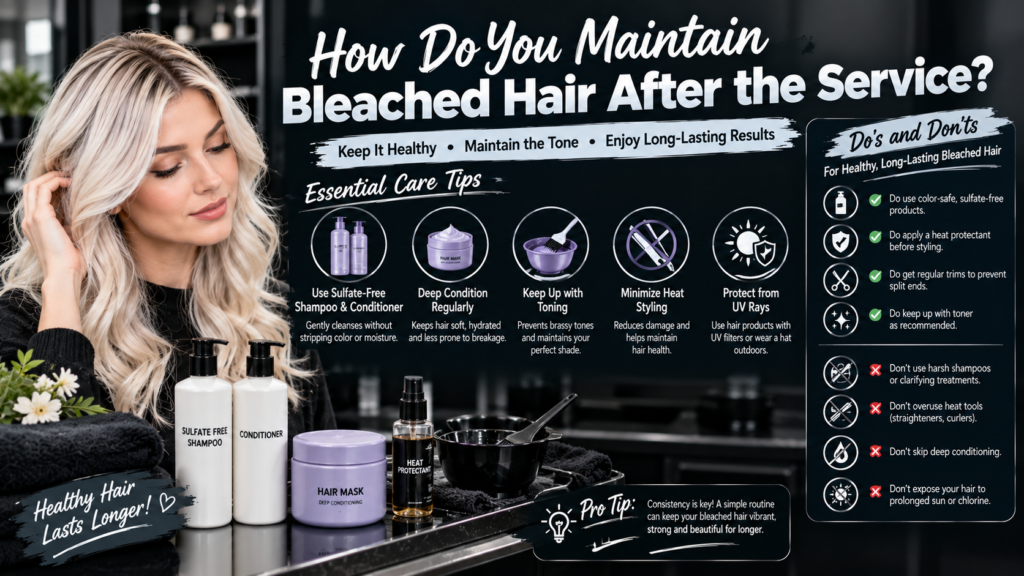
Regular bond-repair treatments and toning refreshes every four to six weeks help maintain both color and hair integrity. Spacing these appointments consistently prevents the buildup of brassiness and keeps the hair’s structure from weakening further.
At Home (Client Recommendations)
- Use sulfate-free, color-safe shampoo to slow down fading.
- Apply a weekly deep-conditioning mask to restore moisture.
- Limit heat styling and always use heat protectant beforehand.
- Space out bleach touch-ups to avoid overlap damage on already processed hair.
Frequently Asked Questions
How long should bleach stay on hair?
Bleach typically processes for 20–45 minutes, checked every 10–15 minutes to avoid over-processing.
Can I leave bleach on overnight?
No. Leaving bleach on for extended periods, including overnight, causes severe damage and potential hair loss.
How many bleach sessions does dark hair need to go blonde?
Very dark hair often needs 2–4 staged sessions, spaced days or weeks apart, to reach a light blonde safely.
Does 30 vol bleach take longer than 40 vol?
Yes. Thirty volume developers lift more slowly than forty volume, but it’s gentler on hair health overall.
Why does my hair still look orange after bleaching?
Orange tones mean the hair hasn’t lifted enough or needs toning to neutralize warm undertones.
Is it safe to bleach hair at home?
It can be, for minor lightening, but professional supervision is recommended for major color changes or previously treated hair.
Conclusion
Bleaching time isn’t one-size-fits-all. It’s a balance of hair type, porosity, developer strength, and the stage your hair needs to reach before it’s considered done. What works perfectly for one person’s hair can easily overprocess another’s, which is why guidelines should always be treated as a starting point rather than a fixed rule.
A single session usually takes thirty to sixty minutes of processing, but very dark or resistant hair may need multiple staged sessions for a safe, even result. Rushing this timeline to save an appointment slot is one of the most common ways hair ends up damaged beyond what a simple treatment can fix.
The safest approach is always a strand test, regular monitoring, and proper aftercare to keep hair healthy once you’ve reached your target shade. Following these steps consistently is what separates a smooth bleaching experience from one that ends in regret.





1 thought on “Hair Bleaching Time: How Long Does It Take? Stages & Complete Chart Guide (2026)”